
Submarine drone
Aim of the project :
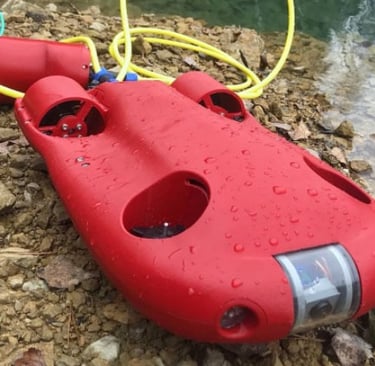
In late 2023, I discovered CPSdrone, a YouTube channel created by Filip and Piotr.
Together with their team, they have taken on the mission of designing a drone entirely manufactured using 3D printing.
I found the approach truly interesting and decided to build an underwater drone myself.
This project was entirely self-funded. As it is a rather complex object, I decided to follow their online course while adding a few modifications of my own.
The drone I am attempting to build will be the CPS 5 (Custom Printed Submarine). To simplify explanations and differentiate their version from mine, my version will be called the CPS T (for Custom Printed Submarine Thomas) from now on. In early 2024, I decided to order the materials, aiming for a construction start date in March 2024.

How the Drone Works :
To aid in understanding this document, I will explain the drone's overall operation and the function of its most important components. I will provide more detail in later sections.
The drone is equipped with 75 different components. Below is a list and description of the most critical parts:
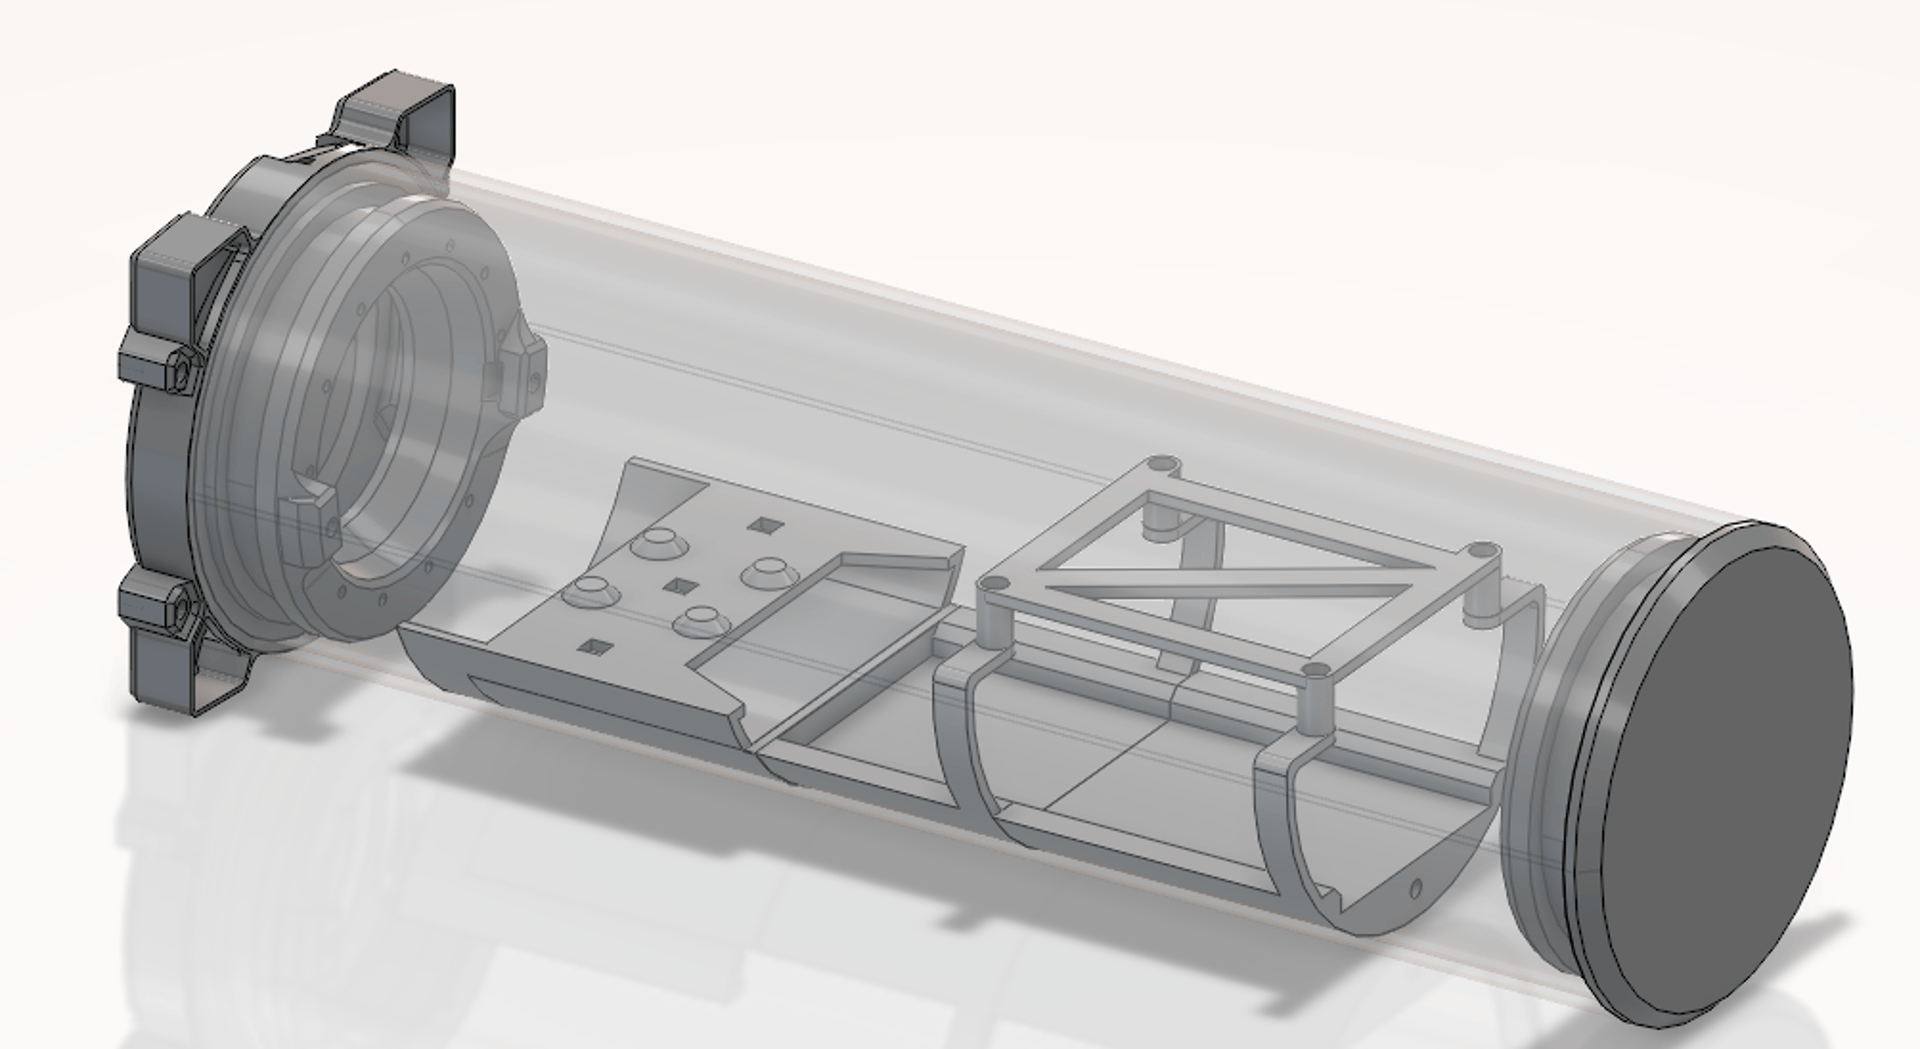
Main Acrylic Tube
This tube contains all the command and control electronics. It is filled with air, and it is essential that no water gets inside under any circumstances.
Main Tube Endcaps
These prevent water from entering the main tube. The two endcaps are different: one provides a simple seal, while the other must allow the command cables to pass through while remaining watertight. This is one of the most critical parts.
Superstructures
These 3D-printed parts make the drone hydrodynamic and hold the various sections of the drone together.
Camera
The drone has a forward-facing camera, which is housed in its own transparent acrylic tube.
3x A2212 motors + 2x Sunnysky motors
These are the drone's motors. Two are used for propulsion (forward/backward) and three are used for direction (vertical and lateral movement). These 5 motors give the drone 5 degrees of freedom.
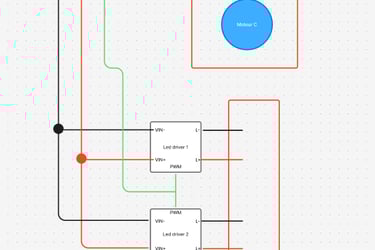
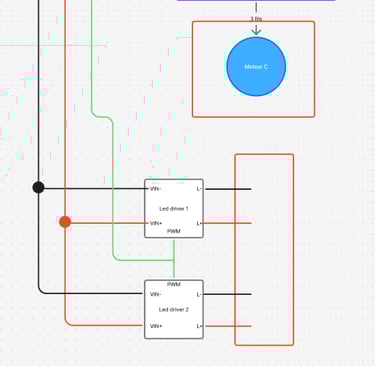
LED Module,
Lens, and LED Control Module These components allow for visibility on the seabed. The system includes 2 LED modules, 2 lenses to focus the light, and 2 control modules to manage the on/off state of the LEDs.
Communication Cable (Tether)
For numerous reasons that I will explain later, the drone is constantly connected to a communication cable running between the PC and the drone.
Batteries
The drone is equipped with batteries configured in 3S2P (12V).
Connector
This is a "WEIPU Connector." I connect the RJ45 cable (for communication) and the power supply to it, which allows the battery to be recharged through the same connector.
ESCs (Electronic Speed Controllers)
The ESCs are used to control the motors. I am using 20A ESCs.
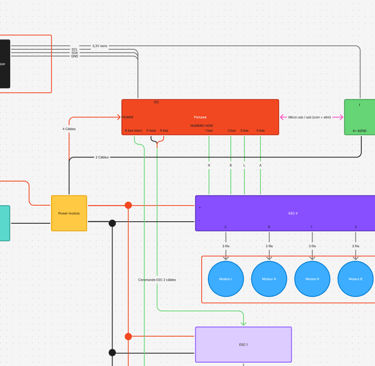
Pixhawk
This is a drone flight control module. It is the component that sends activation commands to the motors. This module is equipped with a gyroscope and offers many advantages. Thanks to it, existing drone piloting software can be used.
Raspberry Pi
The Raspberry Pi manages the video stream and relays commands from the PC to the Pixhawk board.
To aid in understanding this document, I will explain the drone's overall operation and the function of its most important components. I will provide more detail in later sections.
The drone is equipped with 75 different components. Below is a list and description of the most critical parts:
Key Components :
Component Purchasing
To be efficient during the purchasing process, I used a BOM (Bill of Materials). I ordered most of the components from AliExpress. I ordered the Raspberry Pi from Mouser.
The total cost of the drone is €607.02.
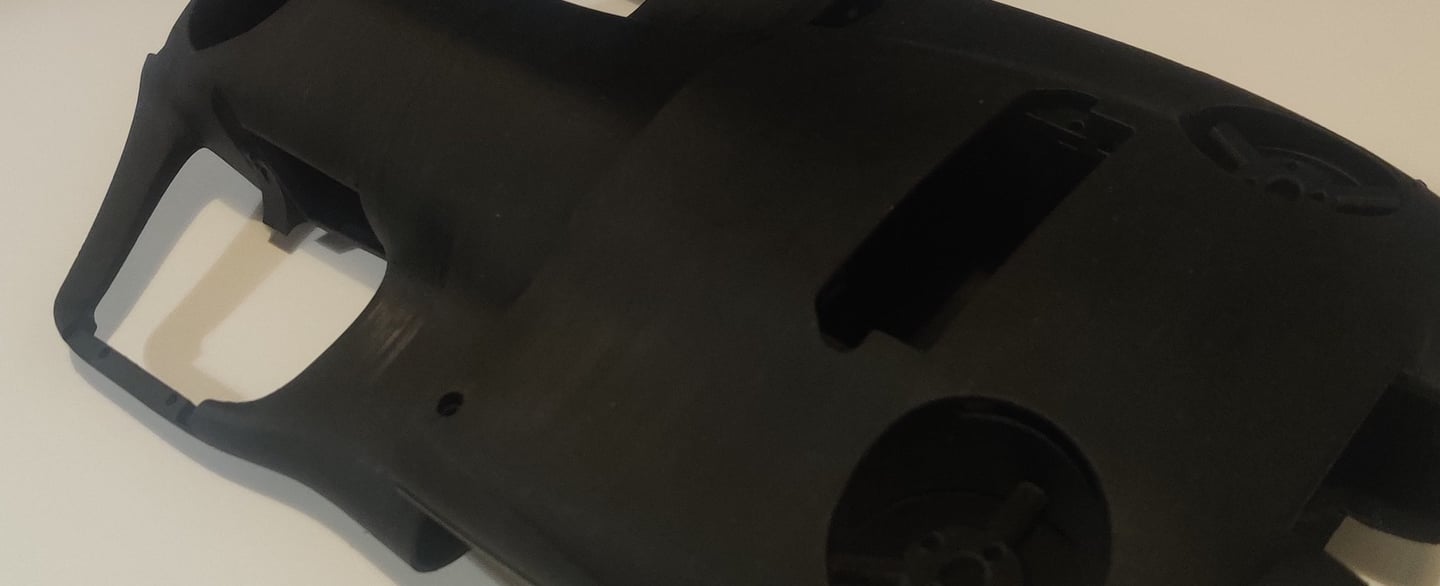
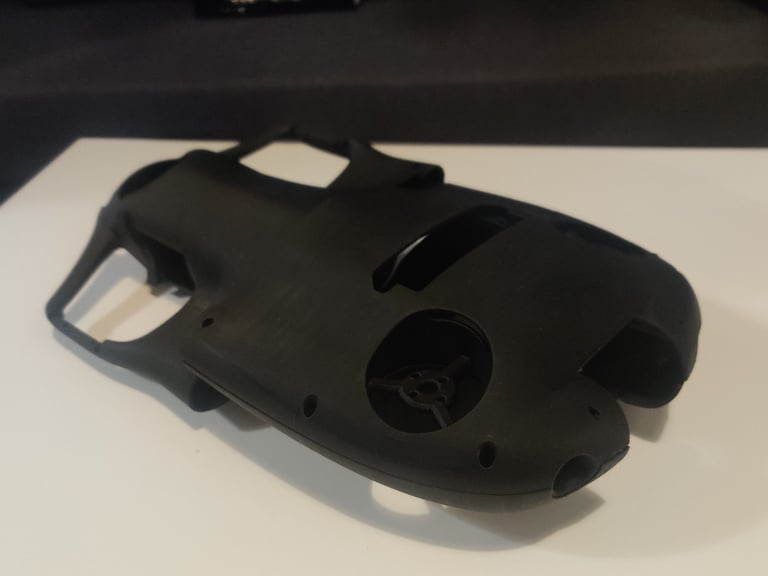
3D Printing the Superstructures
The most complicated part to print is the drone's external superstructure. These are the largest 3D-printed components.
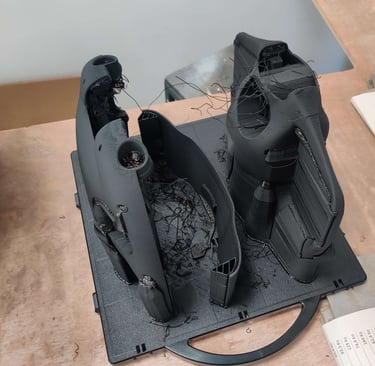
For this, I used a 3D printer from the IUT Brest-Morlaix.
The 3D print took 3 days. After discussing with the technicians at the IUT, we were able to print all three pieces on a single build plate. However, as you can see in the photo, there was a problem with the print of one piece, so it had to be reprinted.

The parts were then placed in an acid bath to dissolve and remove the support material.

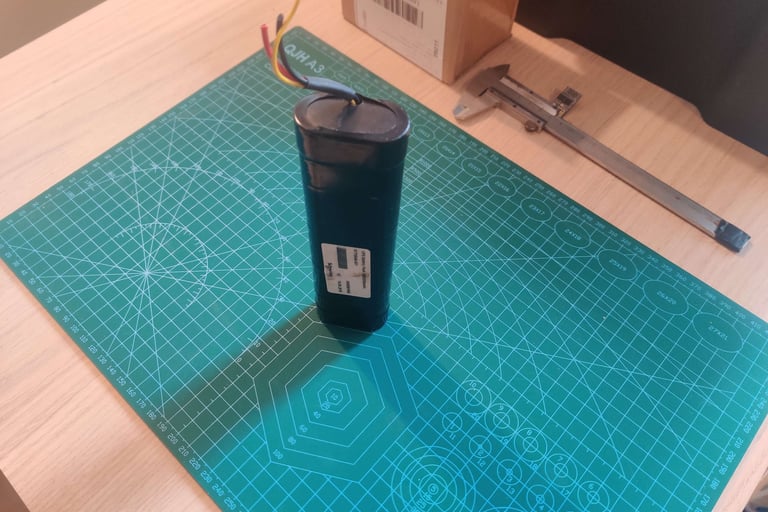
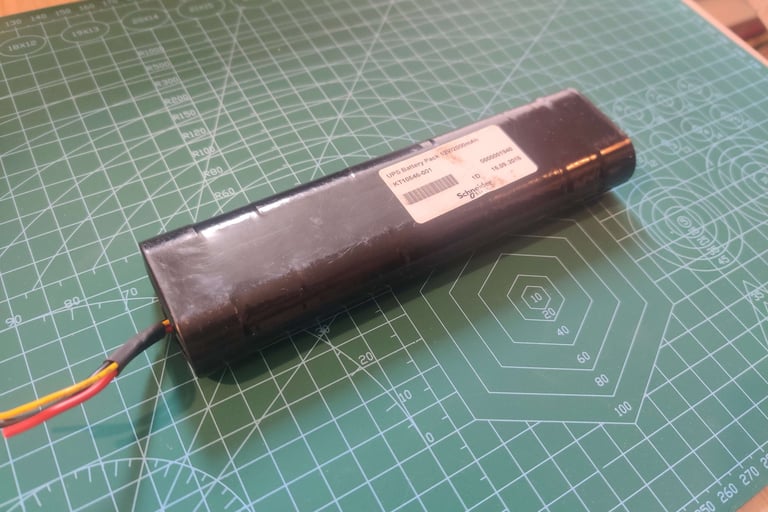
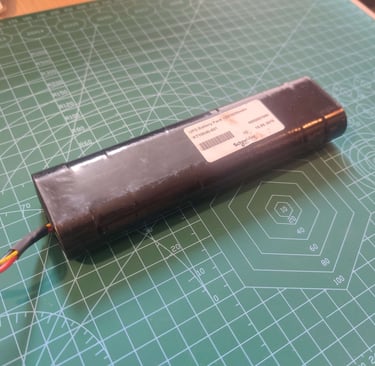
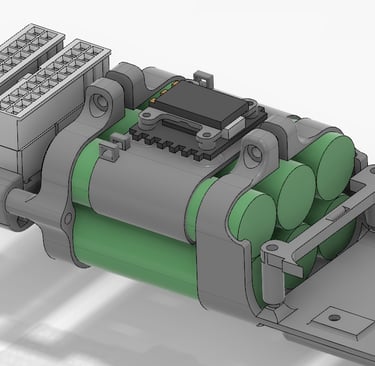
Batteries
chose to use different batteries. These are old lithium-ion batteries from an old variable speed drive. These batteries cost me nothing since they were salvaged.
Compared to the CPS 5's batteries, these will have an included BMS (Battery Management System), which allows the batteries to be charged without a special charger (unlike the choice made for the CPS 5).
The batteries are in a 3S2P configuration and are also 12V. However, they have one major difference compared to the CPS 5 batteries: their layout is not the same.
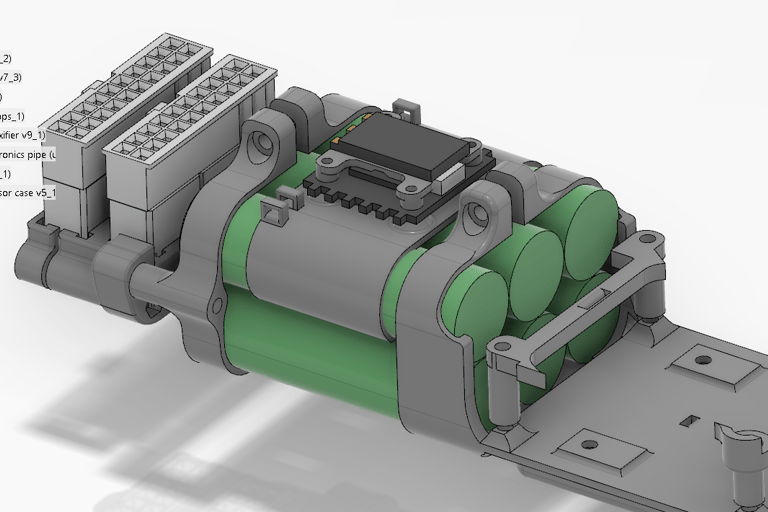
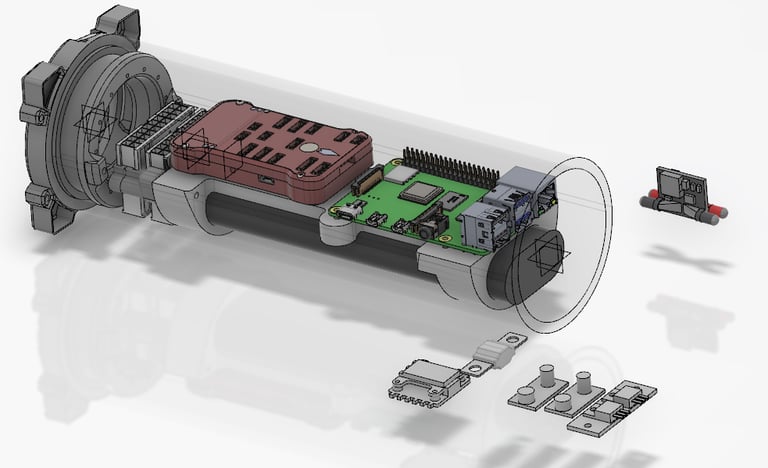
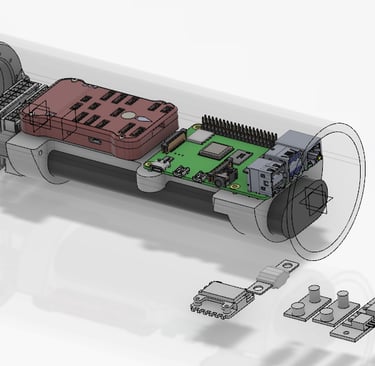
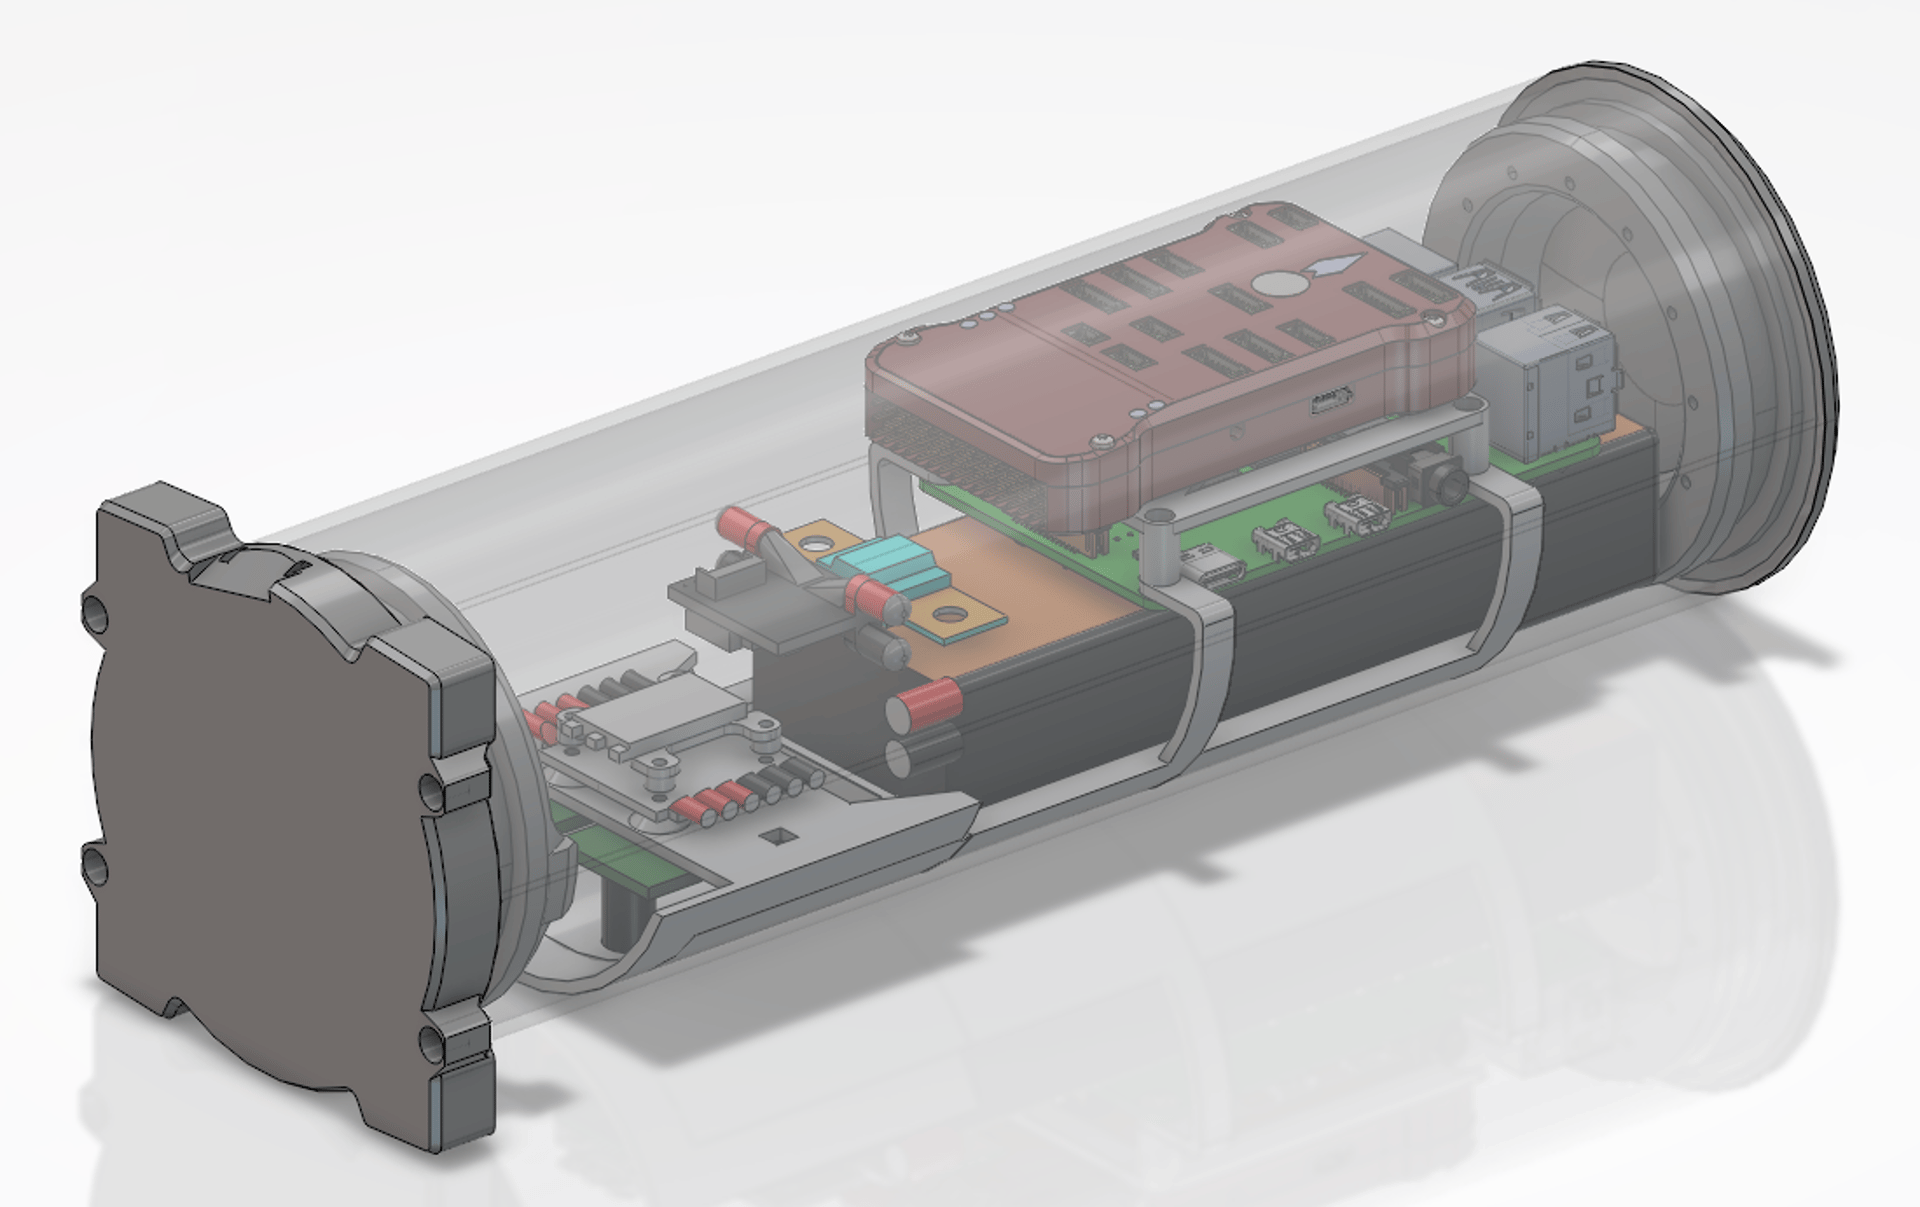
Despite having the same total volume, this means the internal layout of the tube must be completely re-designed. All the internal component supports must also be remade. The process involves:
Placing the largest components (the "gros volumes") first.
Modeling new supports for all components to ensure everything stays securely in place while the drone is moving.

Fonctionnal analysis
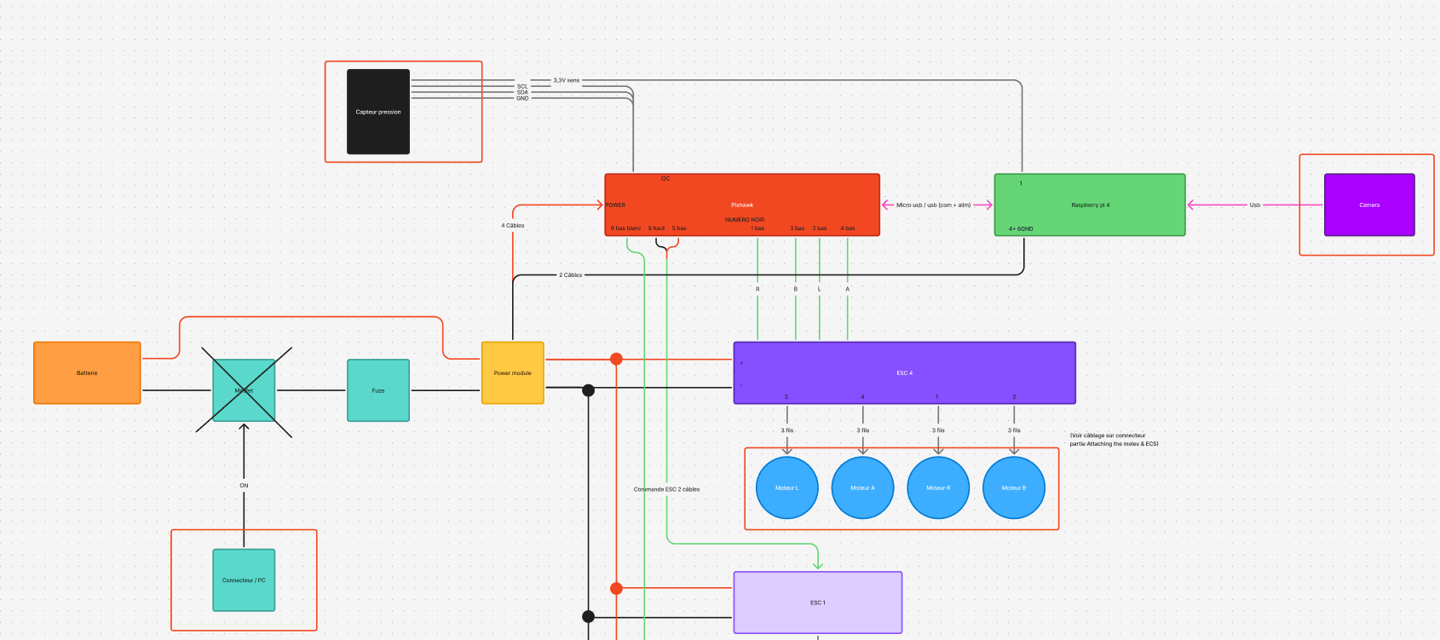
Last CAO up to date

Website in progress